Everything
- Details
Next I started to inswtall and configure the various bits of software I needed.
X11vnc,
A VNC server for the current X11 session, roughly according to this post here.
Slideshow
For the slideshow I used feh. This is a great command line driven image viewer, and provided all the functionality I need. I can use it to;
- Start the standard slide show, with all the pictures changing every 300 seconds (5 mins)
- Show a collage of pictures assembled randomly on screen
- Show the pictures from a removable drive that's been inserted.
There are several scripts to start various styles of slide show, all listed here,most are adapted from those listed by drware here ;
Clock
I also wanted to be able to show a clock full screen on the display. I couldn't find a perfect solution, xdaliclock was about the closest I could come up with. Then I found sunclock, which isn't perfect either, but does look a bit interesting. The clock is started with the start_clock.sh script
Miscallaneous Software
I also installed unclutter to hide the mouse, and autocutsel to keep the clipboard synchronised between my PC and a vnc client, although it doesn't work ! I use osdsh and osdctl to display messages on screen much like the TV on screen display. I also wrote scripts to turn the display on and off, and to toggle between the two using the remote;
Next I started to install and configure the various bits of software I needed.
X11vnc,
A VNC server for the current X11 session, roughly according to this post here.
Slideshow
For the slideshow I used feh. This is a great command line driven image viewer, and provided all the functionality I need. I can use it to;
- Start the standard slide show, with all the pictures changing every 300 seconds (5 mins)
- Show a collage of pictures assembled randomly on screen
- Show the pictures from a removable drive that's been inserted.
There are several scripts to start various styles of slide show, all listed here,most are adapted from those listed by drware here ;
#!/bin/sh
#cron_reload_frame.sh
#Script to reload photo frame via cron
export DISPLAY=:0
/home/paul/scripts/kill.sh feh
#Hide cursor after 10 seconds
/usr/X11R6/bin/unclutter -idle 10 &
#Set Screen to be On
/home/paul/scripts/screen_on.sh
#Start slide show /usr/bin/feh --quiet --recursive --randomize --auto-zoom --full-screen --stretch --borderless --slideshow-delay 300 /media/share/photos &
#Send Message to Screen osdctl -s "Start Slide Show" &
#echo "Ran cron_reload_frame.sh at $(date)" >> /home/paul/cronlog.txt
exit 0
#!/bin/sh
#
#cron_reload_frame.sh
#Script to reload photo frame via cron
export DISPLAY=:0
/home/paul/scripts/kill.sh feh
#Hide cursor after 10 seconds
/usr/X11R6/bin/unclutter -idle 10 &
#Set Screen to be On
/home/paul/scripts/screen_on.sh
#Start slide show
/usr/bin/feh --quiet --recursive --randomize --auto-zoom --full-screen --stretch --borderless --slideshow-delay 300 /media/share/photos &
#Send Message to Screen
osdctl -s "Start Slide Show" &
#echo "Ran cron_reload_frame.sh at $(date)" >> /home/paul/cronlog.txt
exit 0
#!/bin/sh
#
#start_collage.sh
#Script to start feh in collage mode
export DISPLAY=:0
#/home/paul/scripts/kill.sh
sleep 1s
#Hide cursor after 10 seconds
/usr/X11R6/bin/unclutter -idle 10 &
#Set Screen to be On
/home/paul/scripts/screen_on.sh
#Start slide show
/usr/bin/feh --quiet --full-screen --randomize --collage --stretch --thumb-width 240 --thumb-height 360 --limit-width 1020 --limit-height 740 /media/share/photos &
#Send Message to Screen
osdctl -s "Start Collage" &
#echo "Ran start_collage at $(date)" >> /home/paul/cronlog.txt
exit 0
#!/bin/sh
#
#start_collage.sh
#Script to start feh in collage mode
export DISPLAY=:0
#/home/paul/scripts/kill.sh
sleep 1s
#Hide cursor after 10 seconds
/usr/X11R6/bin/unclutter -idle 10 &
#Set Screen to be On
/home/paul/scripts/screen_on.sh
#Start slide show
/usr/ bin/feh --quiet --full-screen --randomize --collage --stretch --thumb-width 240 --thumb-height 360 --limit-width 1020 --limit-height 740 /media/share/photos &
#Send Message to Screen
osdctl -s "Start Collage" &
#echo "Ran start_collage at $(date)" >> /home/paul/cronlog.txt
exit 0
Clock
I also wanted to be able to show a clock full screen on the display. I couldn't find a perfect solution, xdaliclock was about the closest I could come up with. Then I found sunclock, which isn't perfect either, but does look a bit interesting. The clock is started with the start_clock.sh script
#!/bin/sh
#
#start_clock
#
#Script to run a clock (hopefully) in full screen
#
#Created by P Hurley 20 Dec 2007
#
/home/paul/scripts/kill.sh
#Hide cursor after 10 seconds
/usr/X11R6/bin/unclutter -idle 10 &
#Start Sunclock with lots of settings
nice sunclock -clock -clockgeom 1024x768+0+0 -mapmode L -image /usr/share/sunclock/earthmaps/medium/photo1.jpg -luminosity -classname 'NoTitle-Sticky' -setfont 'clockstrip|-*-lucidatypewriter-bold-*-*-24-*-*-*-*-*-*-*' -setfont 'mapstrip|-*-lucidatypewriter-bold-*-*-24-*-*-*-*-*-*-*' -setfont 'menu|-*-lucidatypewriter-bold-*-*-12-*-*-*-*-*-*-*' -spotsizes '4|3|0|0|0' -magx 1.2 -magy 1.2 -dx '-3.38' -dy 11.408 &
#Send Message to Screen
osdctl -s "Start Clock" &
exit 0
Miscallaneous Software
I also installed unclutter to hide the mouse, and autocutsel to keep the clipboard synchronised between my PC and a vnc client, although it doesn't work ! I use osdsh and osdctl to display messages on screen much like the TV on screen display. I also wrote scripts to turn the display on and off, and to toggle between the two using the remote;
- Details
Install the O/S Xubuntu 7.10 (Gutsy Gibbon)
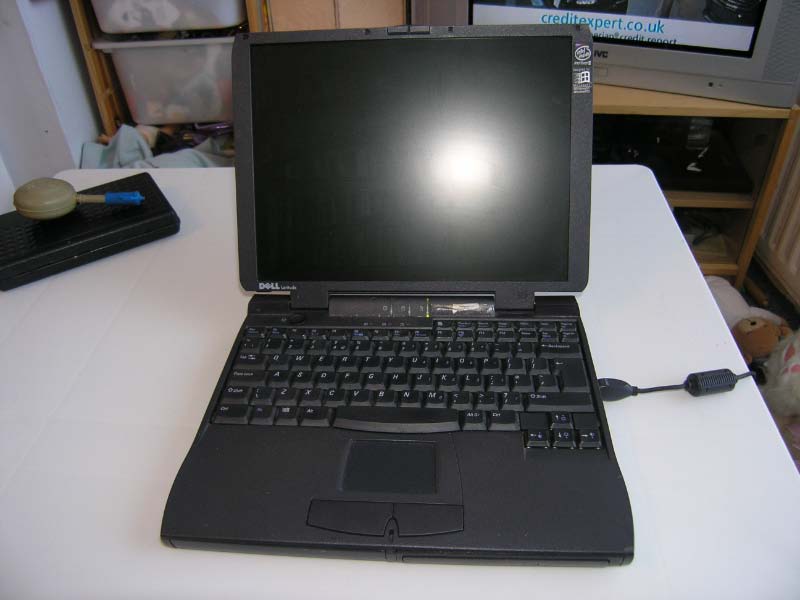
I started with a Dell Latitude Cpi, which was hanging around. This is quite a nice little laptop with the following specs;
- Pentium II 300Mhz
- 256MB Ram
- 1024x768 LCD Display (@24bits, see later)
- 6GB HDD
This should be plenty for a digital photo frame. For O/S I chose Xubuntu for several reasons
- Whilst other projects had used Windows, I knew that Windows would run slowly on this laptop, and would be had to configure headlessly
- Other projects had used Damn Small Linux, which I looked at, but wasn't quite up to my desires
- I was already using Kubuntu on my normal laptop (Compaq Armada M300), so the smaller brother Xubuntu seemed ideal.
So I downloaded and burned a n Alternative Install CD for Xubuntu 7.10 (because my laptop didn't really have the memory for a Live CD installation, I went text only Old School !). This installed fine with a few minor issues;The graphics adaptor in the Latitude is a NeoMagic MagicGraph.. This was recognised by Xubuntu, but configured the display as 800x600 @ 24 bits, it took me a while to work out, but by changing the colour depth to 16bit in my xorg.conf I got the display to 1024x768.
Whilst I was at it, I did a few other things to the base O/S;
I installed ndiswrapper (actually I compiled it from source, because something happened when I compiled LIRC from source that stopped the ndiswrapper from the repositery from working ) and configured it with a Netgear WG511 PCMCIA wireless card
I installed Wicd to handle WPA security for my home network
I disabled everything I wouldnt need, like printing
I installed Samba, and configured it to share out the Share partition which would hold my pictures. That way anyone in the family can add pictures to the frame
I configured laptop-mode so the hard drive only spins up every ten minutes or so
I set the drives with the noatime option in /etc/fstab to reduce hard disk writes as much as possible.
I set the desktop to no image, black colour. I removed the taskbar and made the menubar smaller and autohide
- Details
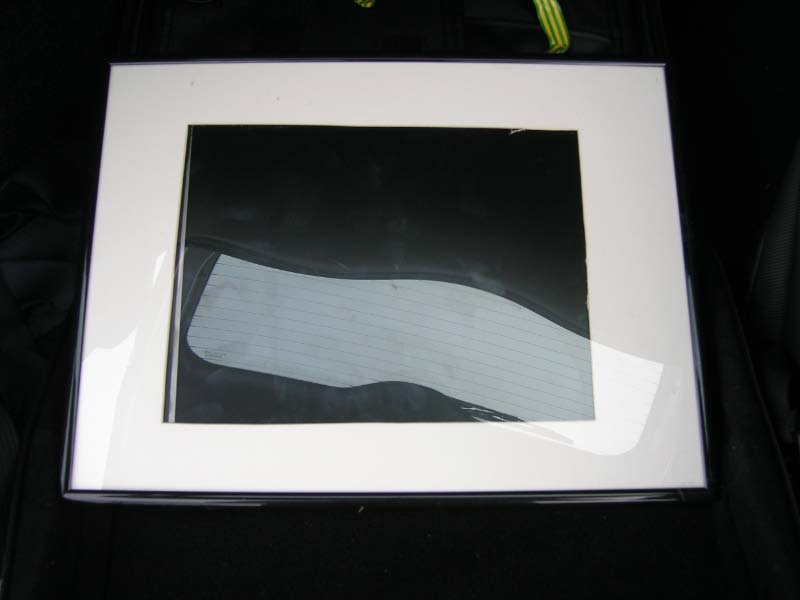
So, I've picked a project. For christmas I'm goign to build a Digital Photo frame out of an old Dell Latitude CPi 300Mhz laptop that' been living somewhere in the loft ! It seems from my friend Google that several otther people have also tried this, so it can't be completely useless.
From this;  , to this;
  !
!
There are 5 more parts to this story (at the moment) so read on;
- Digital Photo Frame Part 2 Build the O/S
- Digital Photo Frame part 3 Configure the Software
- Digital Photo Frame Part 4 Infra Red Control
- Digital Photo Frame Part 5
- Digital Photo Frame Part 6
- (Update) Digital Photo Frame Part 7... Rebuilding it.

(google sketch up model, assembled and exploded !)
So, Steps in rough order;
- Ensure Laptop Works
- Install chosen software (XUbuntu 7.10, Feh, unclutter, Ndiswrapper etc)
- Configure software in some way
- Rip laptop asunder
- Somehow fit the parts of the laptop into a frame of some kind so it looks like a picture
- Impress the family
- (Update) Dismantle it, and change bits to remove the annoying things that didn't quite impress everyone, then impress the family anew !
Page 9 of 12